Often this is an exciting statement made by an elementary student who has found a creepy-crawly or unusual plant. However, for the “cooler” middle school crowd one doesn’t usually encounter this statement…..
until…
You challenge them to look around at the natural world on a “bioblitz”!!!

With the stay-at-home orders, I knew many of my students were inside and getting bored with the same ol’ online assignments. In order to pull the natural world into my World Geography curriculum, I challenged them to a class bioblitz in which each student would make at least 3 observations.
In order to pull this off, I had to consider several aspects:
- Some students and parents are comfortable with online apps and others aren’t.
- Some students have yards or green spaces nearby and others don’t.
- Some students live in crowded apartment complexes with no access to green space.
- Some students have internet access while others may not. I have one student in this category.
- Fortunately, my school is 1:1 with Chromebooks so I was not concerned about the technology for the students to share the information with me. (But this may be a concern for you and I will share what I did for my one student.)
I created four ways for the students to share their findings. Each online student had the choice to pick option #1-#3.
- Students would upload their findings to iNaturalist.
- Students would take photos and submit photos and descriptions to a Google Doc.
- Students would sketch observations, take a photo of their sketches with the Chromebook, and upload to a Google Doc.
- Students would sketch observations and return the paper to the school via the lunch deliver or parent drop off. This is for my student without internet.
The four ways explained in detail….
#1 – iNaturalist
Prior to offering the assignment, you will need to create an iNaturalist project (and possibly your own iNaturalist account). Don’t worry!! It’s rather easy. The video below explains how to do this. There is a “Project Members Only” part that you need to make sure is unchecked for “only display observations from project members.” Checking that box will cause problems when you add your students.
Using this app, the students created their own accounts with parental permission. Then each student submitted a Google Form to share their created username with me. Once a student shared his username, I would edit the project and add that username to the “Include Users” section.
After that any observations the student made would be automatically added to the project.
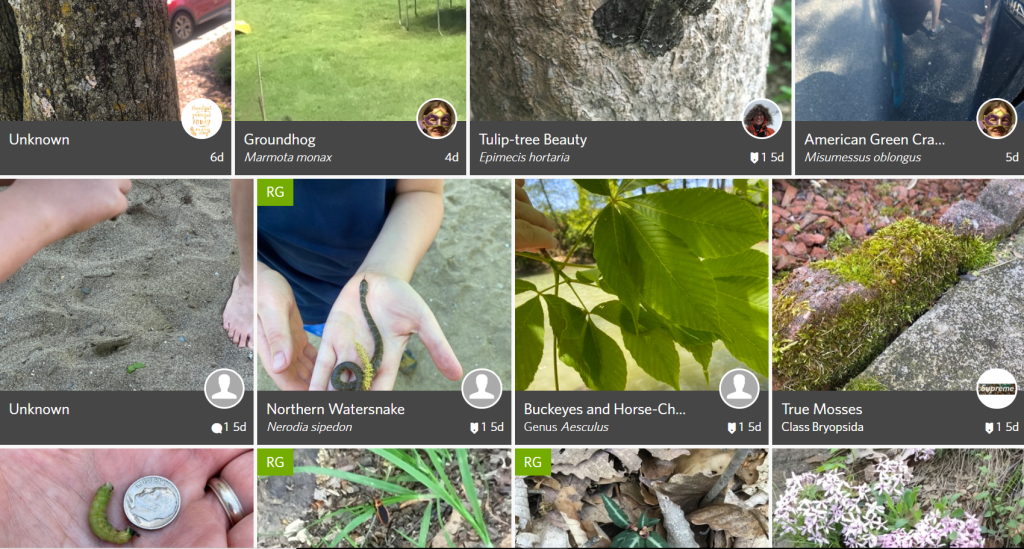
Painter’s Geography Student’s Observations Project – These are the observations made by my students. You will see that one student definitely is now a budding naturalist!!!
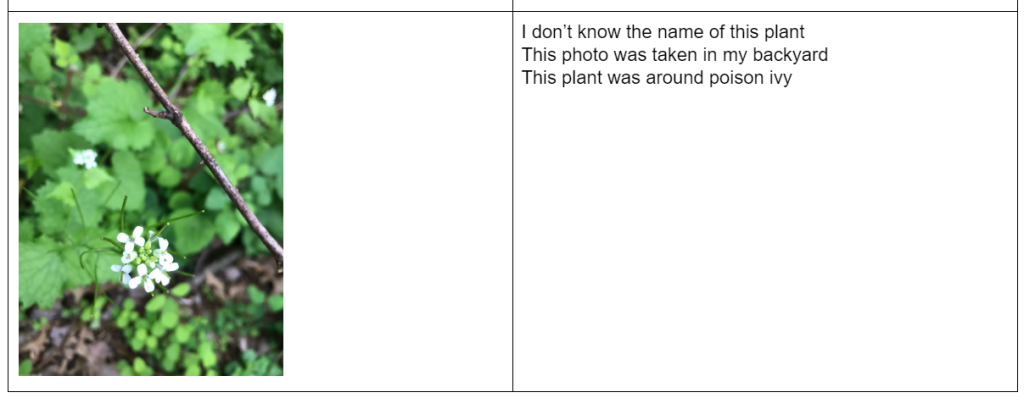
#2 – Photos & Descriptions in Google Doc
Not all of your students will want to submit photos to an app. But they have the ability to collect photos on a device or their Chromebook.
I challenged the students that selected this option to take the photos and then write descriptions of the photo along with where they found it and what they think it might be.
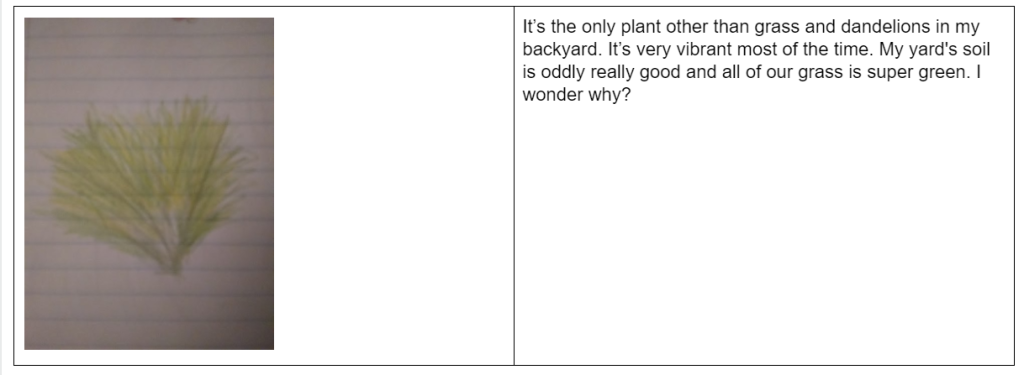
#3 – Sketch & Descriptions in Google Doc
Some of my students like to sketch and for those students I offered more of a nature journal approach.
I challenged these students to sketch their findings and write or type their descriptions when they submitted the sketch photos in the Google Doc. Additionally, I challenged them to consider the view and location of what they were sketching. Thanks to some amazing National Geographic buddies I now know that those would be macro and micro views.
Students were given two YouTube videos with suggestions and ideas for nature journaling. These links are in the Directions Link under Resources.
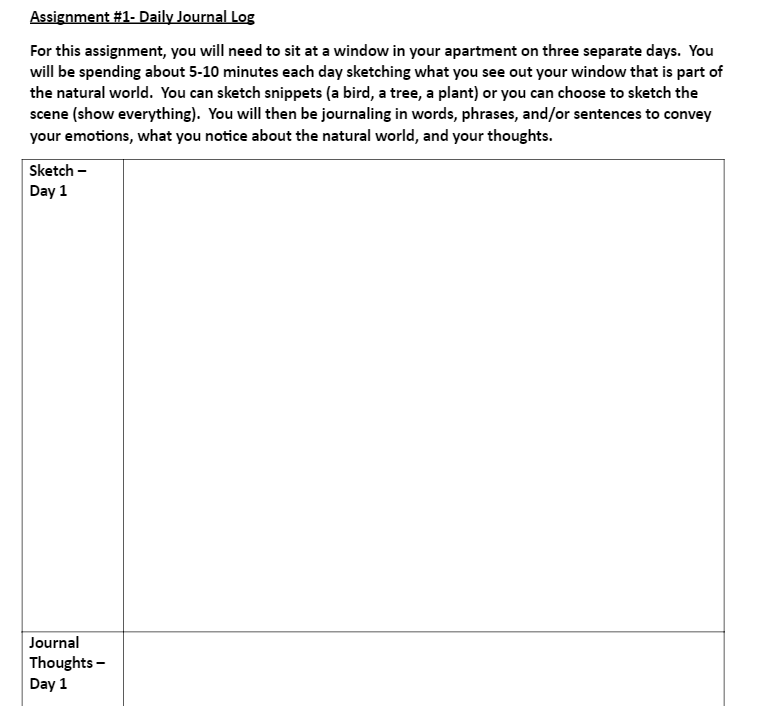
#4 – No Internet submission
For this student, I created a printable assignment for her to sketch and write descriptions. I know that this student lives in an apartment complex in our area that is crowded. I suspect that she is unable to get outside as much and thus, I tailored the assignment to her needs.
And finally, the challenge….
Not only did I challenge my students to find 3 plants, birds, animals, etc that are not human planted or pets, but I offered prizes for the top collectors in each category. Students were offered a home delivery from Chick-fil-A (my students LOVE them), a book on understanding the natural world, or a nature journal. Interestingly, more of the winners picked the natural world book over the meal! As a teacher, that’s a win-win!!! I ended up extending the prizes to the two runners’ up in iNaturalist as three of my students really “took off” with this activity.
Some side thoughts to consider….
- Have the students view the video by iNaturalist on how to make good observations and taking photos. Students will end up with better observations and easier identifications.
- Remind students to attempt to identify the species depicted using the iNaturalist suggested identifications.
- As the educator, go through the student submissions daily to help identify the species. Several of my students were just picking the first suggestion from iNaturalist rather than looking closer. I was able to help tweak their observations.
- Have students revisit their iNaturalist accounts to check for notifications on their observations.
- Explain the special codes to students. RG = research grade which is a great photo!

Photo by MDG.
So finally, consider, are these the comments you want to hear from your students and parents?
“I didn’t know all of this stuff was in my backyard.” – 8th grade student (male)
“You [Mrs. Painter] have created a monster! We can no longer walk anywhere without turning over every rock and taking a picture of every plant we hike by! LOL!” – mother of 8th grade student (female)
If you say YES,
then use this lesson or share another idea to get your students “into the unknown” and natural world!!!!
Resources to help you
iNaturalist Video on making good observations
Google Form for Choice #1 – using iNaturalist
Google Doc for Choice #2 – photos and descriptions
